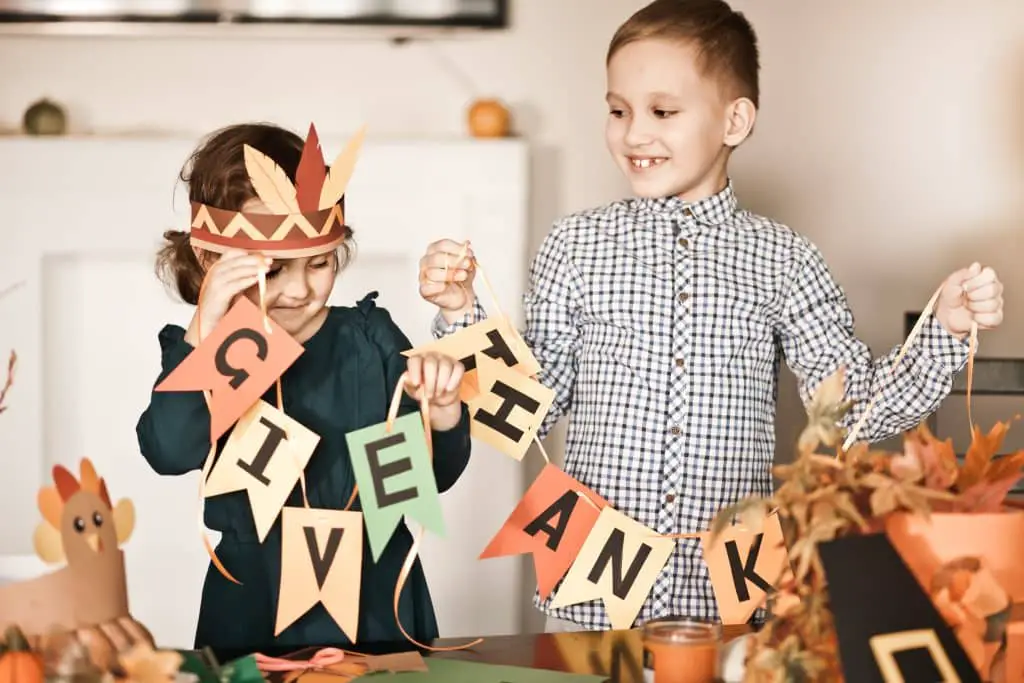
Looking to add a personal touch to your Thanksgiving celebrations? Why not try some fun and creative DIY Thanksgiving craft projects? Whether you’re looking for easy crafts for kids or more sophisticated projects for adults, we have plenty of ideas! These DIY Thanksgiving crafts will create a festive and memorable holiday.
Following our description of each project, there will be a quick reference guide for materials needed and step by step instructions.
SKB’s Favorite Thanksgiving Craft Ideas
Yarn Pumpkins
One of the simplest and most adorable Thanksgiving crafts is creating yarn pumpkins. All you need is some yarn, balloons, pipe cleaners, and glue! Inflate a balloon to the desired pumpkin size and apply glue to the entire surface. Then, wrap the balloon with yarn in a crisscross pattern. Allow the glue to dry completely before popping the balloon and removing it. Now coil a piece of brown pipe cleaner and glue to the pumpkin as a stem. Finally, coil a piece of green pipe cleaner and attach it near the stem as a vine. The result is a charming yarn pumpkin that can be used as a table centerpiece or displayed on a mantle. We recommend storing your yarn pumpkin in a box to keep it from crushing.
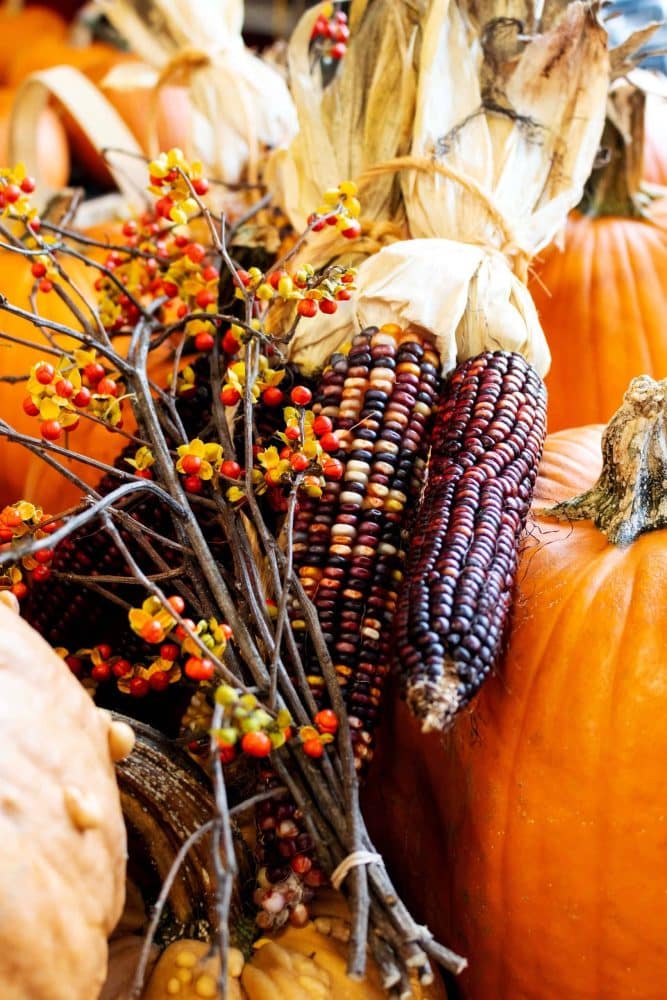
Beaded Confetti Corn Ears
For a craft that adds a festive touch to your Thanksgiving decor and helps develop small motor skills for children, try making beaded confetti corn ears. You’ll need beads, pipe cleaners, and construction paper. Cut the pipe cleaners into desired lengths and bend them into the shape of an ear of corn. Thread the beads onto the pipe cleaners alternating colors to resemble corn kernels. Attach construction paper tassels to the top of the corn ears. These beaded corn ears can be hung up as a decoration, placed on a charcuterie board, or in a floral arrangement. Again, this project will last for years. Please take care with the beads. They are a choking hazard for young children.
Thanksgiving Paper Wreath
This is one of our favorite projects and it’s perfect for your favorite book lover! It’s a great way to repurpose old (with some pages ruined) books. Another great idea is to have the family write what they are thankful for on pieces of paper and then use them to create the wreath. It’s gorgeous and the steps couldn’t be easier. You just lay out 4″ x 4″ squares of light brown paper on a diagonal. With hot glue, glue 3″ x 3″ white squares into top corners of brown ones, lining up squares so a sliver of brown is visible. Mold squares into cone shapes; hot-glue at seams. Repeat step 1 with 3″ x 3″ dark brown squares and 2″ x 2″ white squares. Fold the very bottom of the larger cones up and over the metal wreath base and fasten in front with hot glue all along the perimeter.
Place smaller cones in the grooves between two larger cones. Tuck bottom corners over the ring, fastening with hot glue on the back of the wreath, until entire wreath is covered. Cut off bottom of wheat stalks. Lay wheat tops on newspaper and spray gold. Let dry. Hot-glue wheat tops into grooves between cones. Hot-glue a gold ball below each wheat stalk around inner perimeter of wreath. We go into more details in our blog post, DIY Paper Thanksgiving Wreath.
Woodland Folk
If you’re looking for a whimsical and imaginative craft project, try creating woodland folk using wood pegs, felt, and cardboard tubes. Begin by painting the wood pegs in different colors if you choose for the bodies. Cut out felt clothing and glue it onto the pegs, creating unique characters. Cut a door shape from one side of the toilet paper tube. Using the removed piece of cardboard (the door), manipulate it to become the roof. Double sided tape works great in keeping overlapped cardboard secure. You may choose cardstock as roof material. Next decorate! Perhaps use twigs or raffia for the roof and small pebbles for the house. Older children will amaze you at the details they’ll develop! These delightful woodland folk can be placed on your Thanksgiving dinner table or used as part of a centerpiece. They’ll definitely add a touch of enchantment to your holiday decor.
Paper Pumpkins
If your family and friends don’t enjoy carving pumpkins, we found several ways to ‘carve’ paper pumpkins. You could have a pumpkin carving party. And these pumpkins aren’t as slimy as the real thing. Plus, these will work for less developed skill levels while keeping even the more-developed skill levels intrigued! The Gathering Beauty blog has done a fantastic job of describing several versions of paper pumpkin crafts. There’s even pumpkin origami!
Pom-Pom Turkey
Another adorable craft idea is making pom-pom turkeys. Of course, you’ll need pom-poms! Grab some feathers, brown pipe cleaners, festive felt, and glue and you’re all set. Hop over to our site using the link above for directions. We’ve also included them in this post near the end.
Tissue Paper Cornucopia
Create a beautiful cornucopia using tissue paper, a brown paper bag, and a toilet paper tube. Yup, TP tube again! We won’t even try to take credit for this elaborate DIY craft. Tally’s Treasury has excellent instructions and fabulous pictures. You will not fail if you follow her step-by-step directions. We will add that the cornucopia can be filled with small treats. Place it as the centerpiece on your Thanksgiving table symbolizing abundance and harvest.
Decoupage Leaf Bowl
Try making a fall leaf bowl for a colorful and unique Thanksgiving craft. Easy directions can be found here on our Sisters Know Best website. We even have a YouTube video if you prefer. All you need are fresh colorful leaves, a balloon, and some Mod Podge. No worries if you don’t live in a location with colorful fall leaves. JoAnn’s or Michael’s carries gorgeous artificial leaves. You’ll begin by blowing up your balloon. Paint Mod Podge onto a leaf and press it onto the balloon. Continue adding leaves, overlapping them slightly, until the balloon “bowl” is covered. Remember that this is a bowl. So you’ll want to keep half of the balloon free of leaves. Apply a final coat of Mod Podge over the leaves to seal them. When completely dry, pop the balloon and enjoy your fall leaf bowl! It can hold small items or be displayed as a decorative piece. You’ve created an artistic touch to your Thanksgiving decor.
Oreo Turkeys
Food.com has an awesome ‘recipe’ for making Oreo turkeys. Truly, this is a delicious and fun Thanksgiving craft. You’ll need Oreo cookies, malted milk balls, candy corn, mini peanut butter cups, and some frosting. We think that having a craft day needs to also include yummy treats. Why not plan a couple of crafts and round out the day with these treats? Oreo turkeys make great classroom gifts or fun place settings at a fall gathering.
Gratitude Tree
Capture the spirit of Thanksgiving by creating a gratitude tree. You can gather dried branches that are laying on the ground or create your tree from paper. Never break tree branches for crafting. Sisters Know Best likes to enjoy nature and do no harm. If you find fallen branches, arrange them in a pot or bucket. Placing rocks in the bottom will give your tree stability. Next you will cut colorful paper into leaf shapes. Write on each leaf something for which you’re grateful. Punch a hole in the leaf and tie it to a branch. However, if you prefer a paper gratitude tree, use a large piece of cardboard and cut out a tree shape. Boxes from appliances are great for this craft! Next, you will make leaves in all shapes, colors, and sizes. Write your sentiments on the leaves and glue to the branches of your tree. A gratitude tree is a beautiful reminder of what you’re thankful for and should be displayed for all to see.
Turkey Treats
Make adorable M&M-stuffed turkeys using netting, pipe cleaners, and googly eyes. Cut a piece of netting into a rectangle and place M&M candies in the center. Gather the netting around the candies and secure it with a pipe cleaner. Attach googly eyes, a small orange pipe cleaner beak, and red pipe cleaner wattle. These cute turkey treats can be placed on your Thanksgiving table or given as gifts to children. We found this idea at Clean and Scentsible.
These are just a few DIY Thanksgiving craft ideas to inspire your creativity. Choose the ones that appeal to you and have fun making them. Again, planning a day of crafting is highly recommended! Remember, the joy and satisfaction from creating memories and making unique decorations and gifts are priceless.
Thanksgiving Craft Ideas At a Glance
To bring these DIY Thanksgiving craft projects to life, you’ll need a variety of materials. Here’s a list of the materials required for each craft
- Yarn pumpkins: Yarn, balloons, and glue.
- Beaded corn ears: Beads, pipe cleaners, and construction paper.
- Woodland folk: Wood pegs, felt, and cardboard tubes.
- Paper pumpkins: Construction paper.
- Pom-pom turkey: Pom-poms, feathers, and glue.
- Tissue paper cornucopia: Tissue paper and a construction cone.
- Decoupage leaf bowl: Colorful silk leaves and Mod Podge.
- Oreo turkeys: Oreo cookies and candy corn.
- Gratitude tree: Paint, branches, and clay.
- Turkey treats: M&M candies, netting, pipe cleaners, and googly eyes.
Pro Tip: Make sure to gather all the necessary materials before starting your DIY Thanksgiving craft projects. This preparation will ensure smooth and enjoyable crafting sessions.
Step-by-Step Instructions
To successfully complete each DIY Thanksgiving craft project, here are some step-by-step instructions:
1. Yarn Pumpkins:
- Inflate a balloon to the desired size.
- Apply glue to the balloon and wrap yarn around it in a crisscross pattern.
- Let the glue dry completely, then pop the balloon and remove it.
- The result is a charming yarn pumpkin that can be used as a table centerpiece or displayed on a mantle.
We also found a great YouTube video to show you how to do this:
2. Beaded Confetti Ears of Corn:
- Cut pipe cleaners into desired lengths and bend them into a corn ear shape.
- Thread beads onto the pipe cleaners, alternating colors to resemble corn kernels.
- Attach construction paper leaves to the top of the corn ears.
- Hang the beaded corn stalks up as a decoration, adding a touch of autumn to your home.
3. Woodland Folk:
- Paint wood pegs in different colors for the bodies.
- Cut out felt clothing and glue it onto the pegs, creating unique characters.
- Cut a door shape in a toilet paper tube.
- Decorate the tube with sticks, pebbles, add a roof, etc.
4. Paper Pumpkins:
- Our best advice for making paper pumpkins is to click over to Gathering Beauty’s website. It’s very thorough and has TONS of variations.
5. Pom-Pom Turkey:
- Using a pencil, trace circles of 4 different sizes on to the orange, tan, yellow and red felt. The first circle should be 4 inches and each circle after this should be a 1/4″ inch bigger than the next to create the tail feathers that form the fan.
- Using the scalloped scissors cut out circles of felt.
- Using regular scissors, cut the circles in half (now you can make 2 turkeys)
- Glue felt fans together. With largest piece on bottom, make sure the cut edge is flush and the ruffled part can be seen. End with smallest fan on top. Dry completely.
- Next, cut two small circles of white felt for the eyes.
- Glue the black mini pom-poms in the center of the white to create the pupils.
- Next, cut out a “tie-shaped” piece of red felt for the wattle.
- Cut out a narrow triangle of yellow felt for the beak.
- Glue the red wattle to the beak with beak on top of the red wattle.
- Glue the eyes and wattle/beak to the one inch brown pom-pom to create the face.
- Next, glue the body pom-pom (3″) to the face pom-pom. Make sure it is not directly on the center of the pom-pom but toward the front.
- Glue fans to back of body pom-pom, holding firmly as it dries.
- Cut two 2″ pieces of pipe cleaner and set aside.
- Cut the remaining pipe cleaner in half to get 2 long and 2 short pieces of pipe cleaner.
- At about 1″ down, bend a long piece of pipe cleaner to 90°. This will create the middle toe of turkey’s foot.
- Attach short piece to long by wrapping it at its middle around bend in long piece. Ends of short piece become first and third toes. Use scissors to trim toes if necessary to create uniform length. Repeat for other leg.
- Glue legs to bottom of body pom-pom, allowing glue to dry completely before standing turkey up. Spread toes apart to achieve a stable base.
You can read more about them in our post Pom Pom Turkeys.
6. Tissue Paper Cornucopia:
- Tally’s Treasure has excellent photos which guide you step by step in creating a cornucopia from tissue paper.
7. Oreo Turkeys:
- Place one Oreo cookie as the base. Put one teaspoon of chocolate frosting on top.
- Place one small peanut butter cup on it’s side so that the top and bottom are perpendicular to the base — and stuck in the frosting. Place a teaspoon of chocolate frosting on the top(widest part) of the p-butter cup.
- For the second cookie. Stick some candy corn into the Oreo ‘stuff’ along one edge for the feathers — pointy side down. They should fan out around the edge. If you have trouble doing this, you can help them stick with some white frosting.
- Place this second Oreo cookie (the tail) on it’s edge and sticking to a dab of brown frosting on the back of the peanut butter cup.
- Place a dab of chocolate frosting on top of the peanut butter up (for the head). Place a malted milk ball on top for the head.
- Take a small amount of the white frosting in a separate dish. Mix in red food coloring.
- Use a toothpick with the white and red colors to place eyes, and wattle. You can pinch off the small pointy top of a candy corn and dip it in brown frosting for the beak.
- Thank you to Food.com for the clear instructions!
8. Turkey Treats:
- Cut a piece of netting into a rectangle and place M&M candies in the center.
- Gather the netting around the candies and secure it with a pipe cleaner.
- Attach googly eyes and a small beak to the pipe cleaner.
Tips and variations to consider when making your DIY Thanksgiving crafts:
- Use different colors or materials to customize each craft. For example, experiment with different shades of yarn for the yarn pumpkins or use patterned paper for the paper pumpkins.
- Add personal touches like handwritten messages or names to make your crafts even more special. Consider writing gratitude words on the gratitude tree leaves.
- Experiment with different sizes or shapes to add variety to your crafts. For instance, you can create pumpkins of various sizes using different sizes of construction paper for the paper pumpkins.
- Incorporate natural elements into your crafts for an organic and rustic feel. For example, use pinecones, acorns, or leaves as decorative elements.
- Get creative and have fun with your DIY Thanksgiving crafts. Let your imagination run wild and explore different possibilities to make each craft unique.
Incorporating Crafts into Thanksgiving Decor
- Your crafts should take center stage! Place them on the dining table, of course. But, also paper pumpkins in a guest bath or a cornucopia on an entry table will work.
- Display the crafts on the mantle, shelves, or windowsills to create a warm and inviting atmosphere. Arrange the woodland folk with some pinecones alongside autumn leaves and other seasonal decorations.
- Hang the crafts as a garland or create a Thanksgiving-themed banner. Attach the paper pumpkins to a string and hang it in a prominent place.
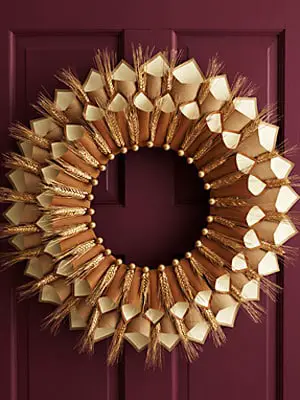
- Incorporate the crafts into Thanksgiving wreaths or door decorations. Attach the beaded ears of corn to a wreath for a unique and festive display.
Thanksgiving Craft Ideas for Kids
- Yarn pumpkins, paper pumpkins, and pom-pom turkeys are all easy and fun crafts for kids. Let them get creative with different colors and decorations.
- Encourage kids to collect leaves, pinecones, or rocks during nature walks to use in their crafts. This adds a personal and natural touch to their creations.
- Let kids personalize their crafts with their own creative ideas. They can add googly eyes or draw faces on their yarn pumpkins or create unique patterns on their paper pumpkins.
- Crafting is a great way to keep kids entertained and engaged during the Thanksgiving festivities. It also allows them to express their creativity and contribute to the holiday decor.
- Encourage their imagination and let them explore the joy of creating something with their own hands.
Thanksgiving Crafts for Adults
- DIY wooden turkey decorations, felt wreaths and pumpkin mosaics are popular adult crafts. These projects allow for more intricate designs and can be displayed year after year.
- Adults can also create Thanksgiving gifts like a pumpkin pie necklace or a mulling spices kit. These handmade gifts add a personal touch to your holiday giving.
- For those who enjoy hosting Thanksgiving dinner, creating DIY Thanksgiving table settings ideas can be fun. Make cake stands or photo place cards to add a special touch to your table decor.
Adults find joy in creating unique Thanksgiving decorations and gifts. It’s an opportunity to showcase their artistic skills and add a personal touch to the holiday. Take some time for yourself and indulge in the pleasure of crafting during the Thanksgiving season.
Longer Weekend Projects
- Thanksgiving centerpieces, wreaths, and decorations can be more time-consuming but are very rewarding projects. These larger-scale crafts will become the focal point of your Thanksgiving decor. Don’t rush to process. Enjoy it!
- Printable Thanksgiving crafts provide pre-designed templates and instructions for longer projects. These crafts often involve cutting, assembling, and gluing various pieces to create intricate designs. As an adult, you know that rushing the gluing process is never a good idea.
Taking on longer weekend projects can be a great way to spend quality time with loved ones or to unwind and relax during the holiday season. Again, enjoy the process and let your creativity flow as you embark on these more ambitious craft projects.
Nature-Inspired Crafts
To bring the beauty of nature indoors, here are some nature-inspired Thanksgiving craft ideas:
- Use leaves, pinecones, and rocks to create autumn-themed crafts. For example, you can create leaf sprites by combining construction paper leaves and pipe cleaners.
- Incorporate natural elements into your Thanksgiving decor for an organic and rustic feel. Use pinecones, leaves, and rocks alongside your crafts to create a cohesive and nature-inspired display.
- Embrace the beauty of nature and let it inspire your creative endeavors.
And finally….
Engaging in DIY Thanksgiving crafts can be a wonderful way to add a personal and creative touch to your holiday celebrations. Whether making crafts with your kids, creating decorations for your home, or giving handmade gifts, there are plenty of ideas here to suit your style and skill level.
From yarn pumpkins to gratitude trees, the world of DIY Thanksgiving crafts offers endless possibilities. So, gather your materials, follow the step-by-step instructions, and let your creativity shine this Thanksgiving season. Enjoy the process of crafting and take pride in the unique decorations and gifts you create. Let us know how your projects turn out!