 New project! Easy project! Cheap project! Very happy sister!
I had a visitor last week and wanted to have a backup plan in case of rainy weather. I was scrolling through Pinterest – a favorite thing of mine to do – and saw DIY paper lanterns. It had all the criteria – easy and affordable! The project was a huge success for us and the possibility of designs is limitless! I think doing a bunch of balloon designs for an evening birthday bash would be awesome! Wild explosions for the 4th of July! Dragonflies! Animals! ooooohhhh!
Here’s what you need:
- Glass jar (we used pint mason jars)
- Candle that fits nicely in the bottom of your jar (we used tea lights in aluminum cups)
- Vellum paper (optional)
- Cardstock (large enough to wrap around your jar and covering the height of the jar)
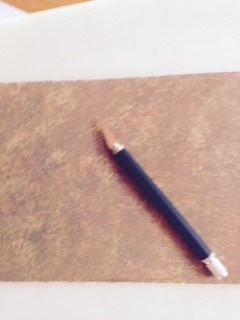
- Pencil
- Xacto knife and cutting mat
- IMAGINATION
 We found some scrapbooking paper. It’s better to use the thicker kind. Cardstock would work, but what we used was in between the thin kind and super heavy. You know what I mean! Choose something you think is beautiful. I have loads of paper that was “too nice to use”. What’s up with that? Happily, I’ve reached the age where I want to use up this stuff and surround myself with gorgeous things. Afterall, it’s PAPER, not gold!!
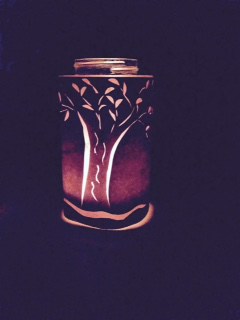
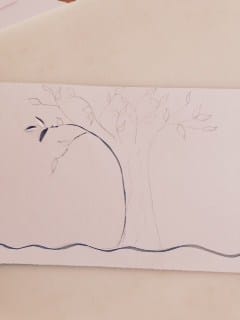
On the back side of the paper we sketched out our designs. Mine was a tree, and Kayla used stencils with an anchor and birds. Let your imagination take over! And if you sketch lots of things and decide not to use them all, no worries. This is the BACK SIDE of your paper and no one will see it.
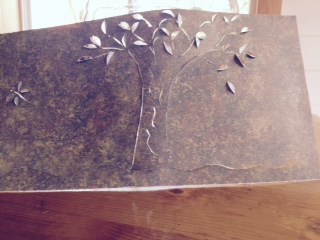
 After the design was sketched, we used an Xacto knife and cut on our lines. Don’t forget a cutting board to protect your table surface! Obviously this craft is not for the very young or super careless! After cutting on the lines for the tree trunk, for instance, I went back and cut a small sliver of paper beside my initial cuts. You can see in the photo on the left the part that I have cut. If you keep in mind that you want the light to shine through areas as an outline for your shapes, it may help in the process. For my leaves I slit half of the leaf and then folded it. It’s hard to see in my photo, but this gives the project dimension. It’s pretty cool!!!
 The directions I read said to use Vellum paper (get it at Joann.com) to cover your glass container before putting on your design. I happened to have some Christmas Vellum paper so I did use it. (See, I really am using up stuff! And no guilt here — feel pretty good about it actually!) In future I probably won’t, however, because I don’t think it’s really necessary and my goal is to use up stuff. The Vellum, in my opinion, softens the candle glow. Nice effect; but if you don’t have any and don’t want to make a trip to buy supplies, skip it!
 Next we wrapped our cut-out design around the jar and taped it — couldn’t find the glue and we were so excited to see it finished!
Lesson learned: Next time I would use glue. It’d look more professional and last longer.
Overall, this project was a breeze to make and I would do it again! As I said, the possibilities are endless so let’s see what YOU’VE got!
Put it in the comments here or share it on our Facebook page! Either way, we’d love to see it!