If you’re looking for a super fast #DIY jewelry project, here’s an idea for making bracelets. This craft is easy enough to do with children — even a group of children, but it also can be detailed and more elaborate if you choose for an adult project.

I love beads and baubles and natural fibers — hobo chic kinda stuff. After a birthday lunch with Mom and Chris, we went shopping for black lace. Chris needed the lace — and it’s not like that! Another craft project coming your way soon. It was interesting how Chris and I go to opposite directions in a store. She has more bling and I go for subtlety.
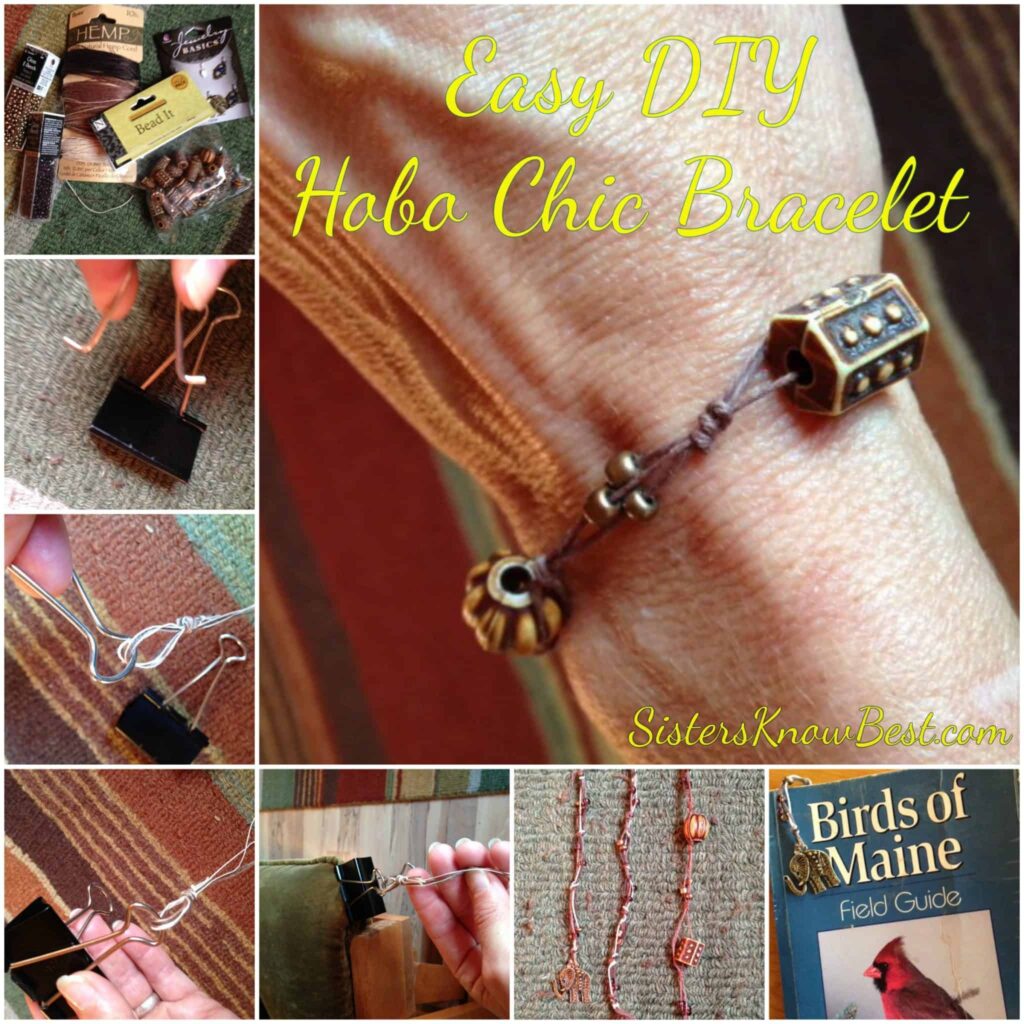
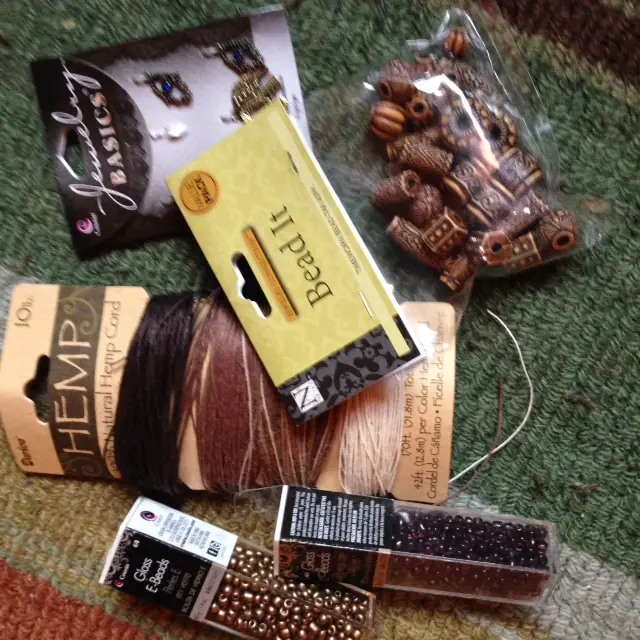
My idea was to get thin cord on which to easily string beads, make a few knots, and call it a bracelet. Here’s what I purchased for only $12 at Joann’s!:
After cutting 4 strands of cord approximately 36″, make a slip knot and then make an overhand knot so the remaining loop is large enough to go around a bead which will be used as a clasp of sorts to close your bracelet. Next you’ll start stringing beads randomly (or not so randomly) and making knots to hold them in place. I like leaving a little space between knots so my beads aren’t stiff but can have movement. Your preference = your bracelet!
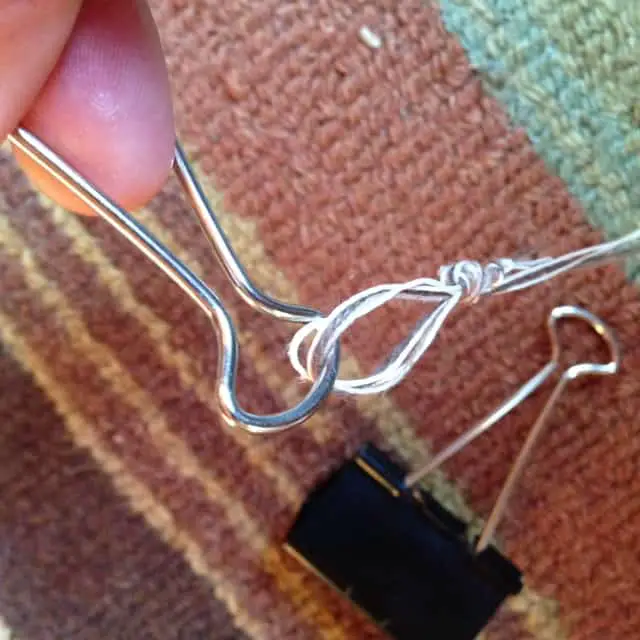
I found this really cool idea online for holding the cord while stringing. I watched the gentleman’s video but cannot find it again to include his link or name. My apologies as this is REALLY a cool idea. He removed from an Acco paper clip one of the side clasps. See photo below.

You then place your loop on the clip and return it to the Acco fastener.
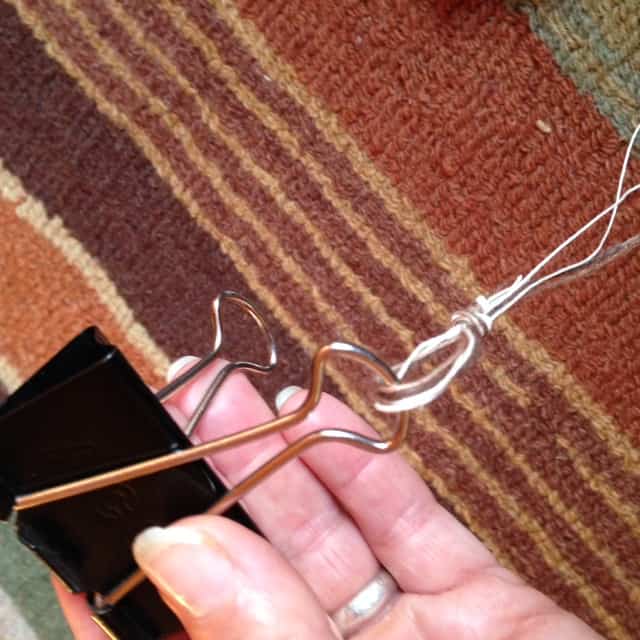
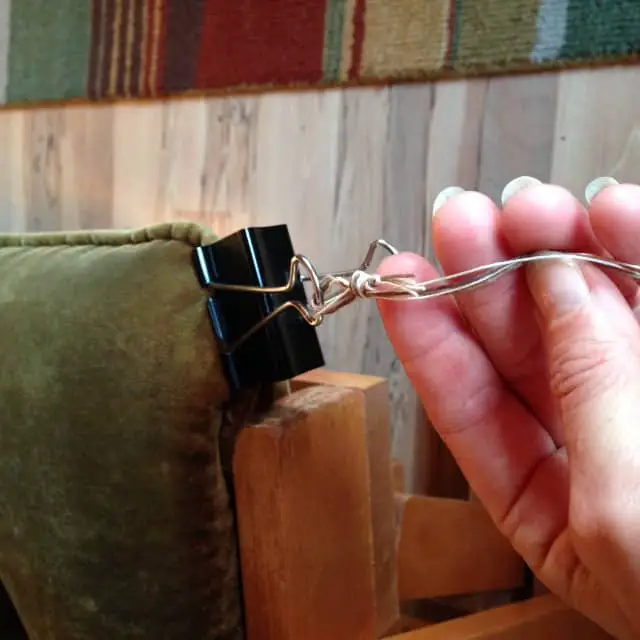
You can now clip to a couch cushion, your shirt, or whatever works to hold your project as you add beads and make knots.
Now simply place beads on your cord and then tie overhand knots to secure them. When you have enough length for your bracelet to encircle your wrist, add one final bead that your loop from the beginning will slip over to secure your bracelet. I put the final bead on one or two strands of cord and tie a knot securing the bead in place. One more overhand knot and you’re done. Trim excess cord for a polished look. I loved the results so much I decided to make bookmarks as well. One can never have too many baubles!
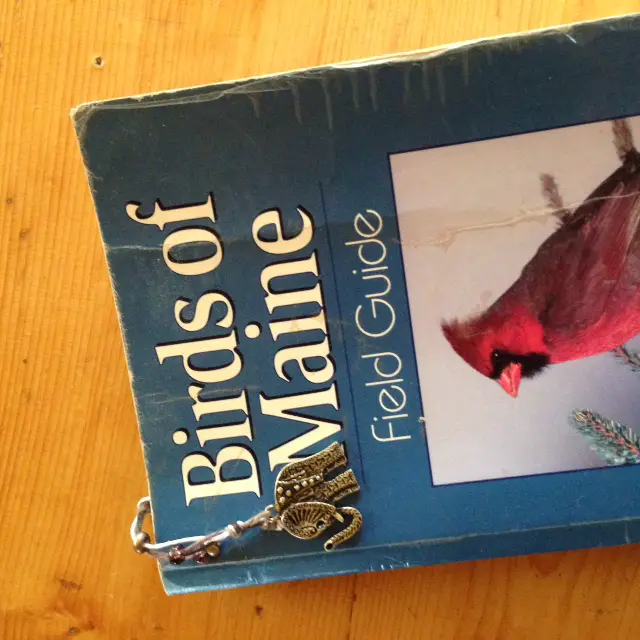
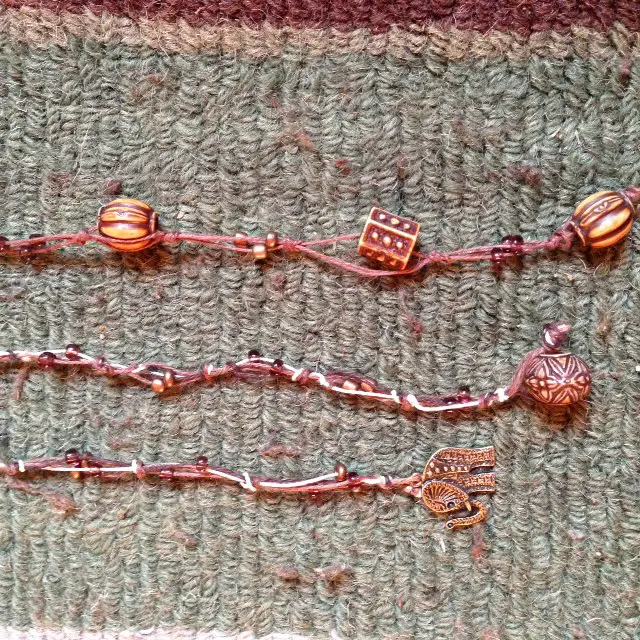
I love elephants and that is why I chose the design I did for my bookmark.
What’s your favorite animal? And would you put it on your jewelry?