Have you seen it yet? Rock Art – easy, cheap, creative, fun, addictive! It’s all these things! Oh, and requires readily available supplies.
We first saw Rock Art on Pinterest. It was cute. It made us smile. We pinned a few pictures. We said we’d do it. Well, we finally did; and we think you should as well! (Stay tuned for the Big Magic – it’s near the end of this post.)
It’s ironic that we’re writing a post about rocks. Rocks? Aren’t they everywhere, you say. Yes, but living in the Northeast makes spring a time when you’re excited to see rocks. You’re excited to anything that isn’t white! The snow is gone (or going in Emily’s case), and the end of a long winter makes us want to be outside. And it makes us want to create. Anything. Anyhow. Anytime. Anywhere. (Did we mention it’s been a looooong winter?)
To begin making rock art, find an area where there are rocks. Duh, right? I suppose you could buy some rocks; but, honestly, you need to get outside! You’ll want to look for flat rocks. They don’t necessarily need to be smooth, as texture will give your design some depth. However, smooth rocks have their purpose as well so don’t rule them out or drive yourself crazy looking for the “perfect” rocks.
We found ours while sitting outside in the sun (AH! The first warm days require we MUST be outside.). Just looked down, and voila! rocks! Nice rocks. Long skinny rocks for legs. Round rocks for heads. Triangle rocks for girls’ dresses. Squarish rocks for guys’ bodies. There’s no rhyme or reason here. No one’s going to tell you you’ve done it wrong. There is no wrong! As the Nike commercials of old used to say: “Just do it”!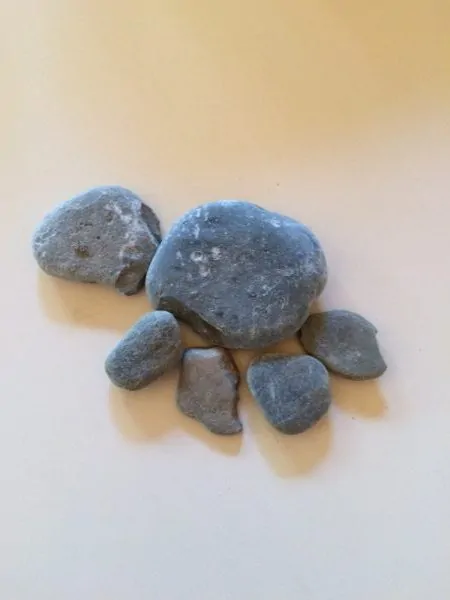
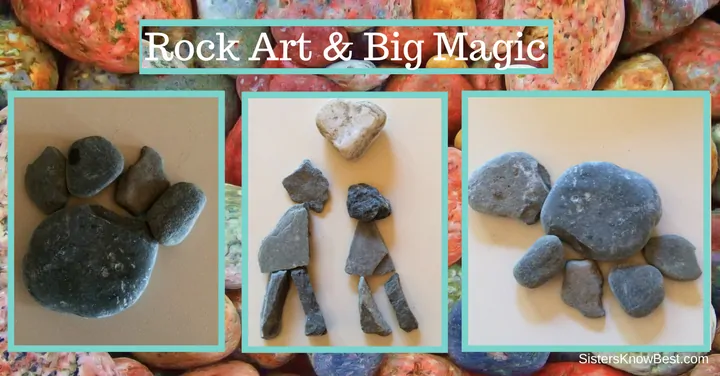
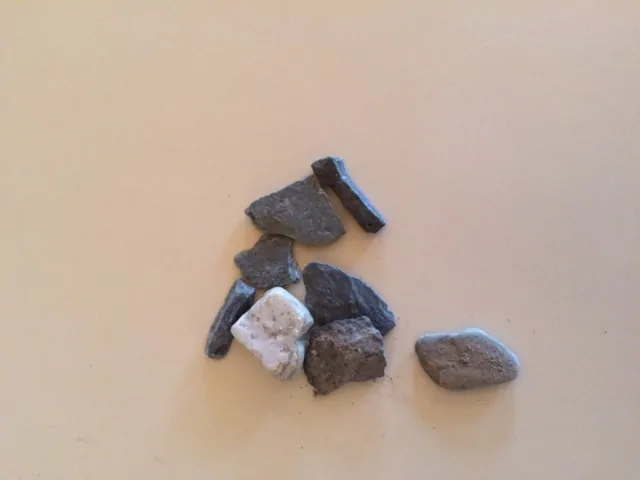
Can you see the white heart in the pile? Cool!
Don’t forget the animals as you’re designing. Here’s a paw: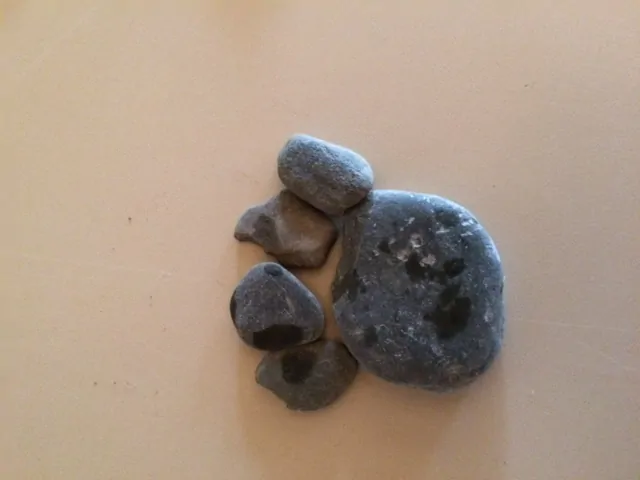
Once you have a nice selection of rocks, play around to make a design. There’s no rush. The rocks aren’t going anywhere. Once you’ve made a design to your liking, use Liquid Nails or a glue gun to adhere your art to a piece of cardboard or wood. That’s it. Simple. Done.
Remember those stress-relieving trays of sand with mini rakes and such? How about having a tray with a few rocks for people to make different designs when they’re stressed? We think this could catch on. It may. You never know.
Rock Art & Big Magic

Hey, the sun’s back today. We’re headed outside. What’s your day looking like?