
Lemon Poppy Seed Bread is Light and Refreshing
We all have those recipes that quietly become part of our routine. Lemon poppy seed bread is one of ours. It is the loaf we bake when we want something sweet that still feels fresh. Or when we have lemons that need using. Or when we want a homemade treat that does not take over the whole day. It works for a quick breakfast slice, a mid afternoon snack, or something to set out when people drop by.
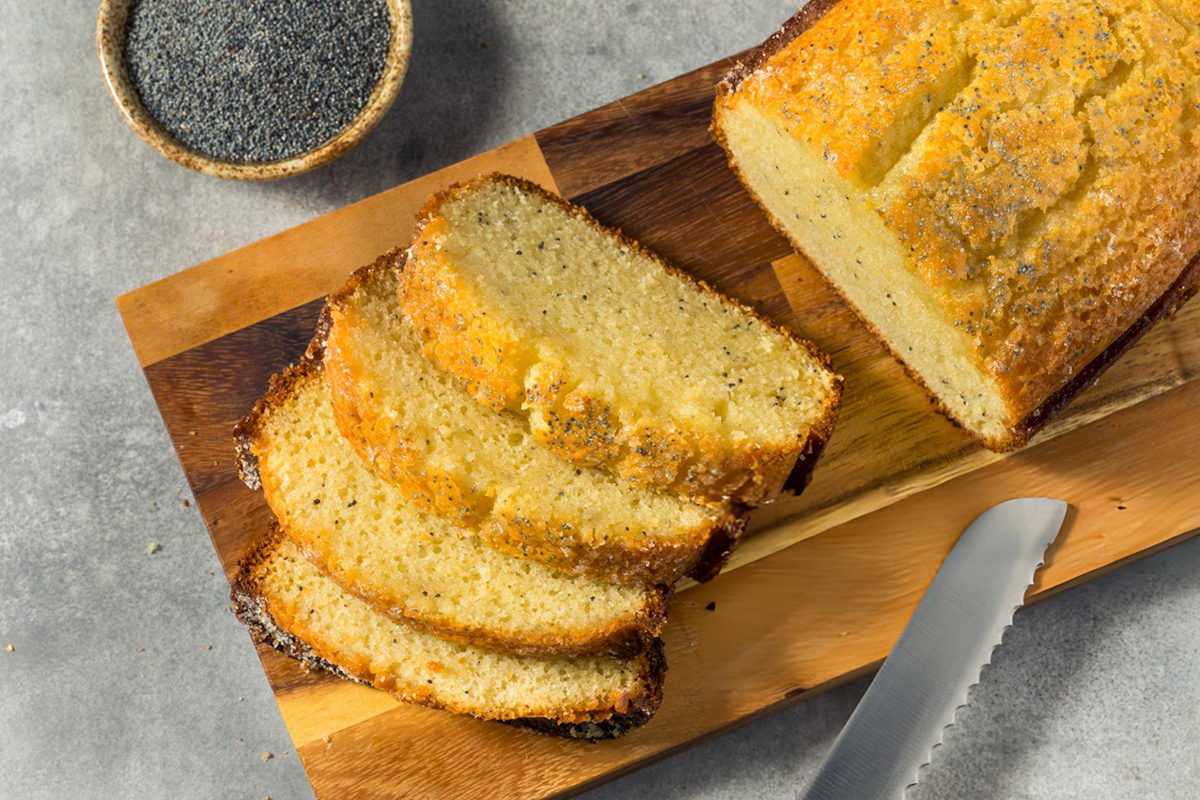
What really gets us is how the kitchen smells while it bakes. The lemon zest gives off this bright citrusy aroma that makes the whole home feel awake – even if we are baking in slippers and moving slowly! We also love those tidy slices with poppy seeds scattered through the crumb. It looks like we tried harder than we did. Honestly, this is one of our favorite kinds of baking!
Why You’ll Love This Recipe
This is the kind of quick bread you can make on repeat because it checks a lot of boxes without being fussy.
- The lemon flavor comes through clearly because we use zest and juice, and the loaf tastes lively instead of just sugary.
- The crumb stays soft for days meaning you can bake once and keep slicing without worrying it will dry out by tomorrow.
- The poppy seeds give a gentle crunch and a little contrast in every bite. So it’s not just a smooth, one note loaf.
- The top can get a light crispness if you add a sprinkle of coarse sugar to give it a little bite without needing a glaze.
- It is a reliable bake for sharing because it travels well and slices neatly once it has cooled.
Let’s Talk Ingredients
Lemons do most of the work here, so we like to use fresh ones whenever possible. The zest matters just as much as the juice because it carries those fragrant oils that make the loaf smell and taste like real lemon. When we take the time to zest before juicing, we get a fuller citrus flavor that feels built in, not added on at the end.
Poppy seeds are small but mighty. They add texture without making the bread feel seedy or heavy, and they bring a subtle nuttiness that plays well with lemon. We also like the way they look in the slices, especially when we are serving this to guests and want something that feels a little special without extra steps.
The dairy in the batter helps keep everything tender. A thicker dairy ingredient gives the loaf a nice structure and a soft bite, and it also balances the lemon so it does not come off too sharp. This is one of those recipes where the mix of tangy dairy and citrus just makes sense.
We also lean on oil for quick breads like this because it helps the loaf stay moist longer than many butter based batters. The result is a slice that stays soft even after it has been wrapped up and stored. This is exactly what we want for a loaf that gets eaten over a couple of days.
Step-by-Step Cooking Tips
Quick breads are simple, but we get the best results when we slow down in a couple key moments. First, we make sure the lemon zest is evenly worked through the dry ingredients so the flavor is consistent from slice to slice. If we see any little clumps of zest, we break them up so they don’t bake into one strong, tangy pocket.
When it is time to combine wet and dry, we treat the batter gently. We want everything just combined, not beaten smooth. A few small lumps are normal, and they disappear in the oven. Overmixing is what turns a tender loaf into a tight one. Make sure to stop as soon as the flour is incorporated.
Baking time can vary depending on the pan and the oven, so we use a mix of visual cues. We look for a top that is set and lightly golden, and we pay attention to how the loaf pulls away from the edges. A toothpick test is helpful, but we also watch for that center to look baked through, not shiny or wobbly.
Cooling is where this loaf really sets up. If we slice too early, the crumb can compress and feel a little gummy. Once it is fully cool, the texture settles and the slices hold their shape. If we want to add something extra, we can always do a simple drizzle later, but we honestly love the loaf plain – especially with that little sparkle of sugar on top.
Equipment Needed
- Loaf pan, used to bake the batter into a loaf that slices cleanly.
- Parchment paper, used to line the pan for easy removal.
- Mixing bowls, used to combine wet and dry mixtures separately.
- Whisk, used to mix ingredients smoothly without overworking the batter.
- Rubber spatula, used to fold the batter gently and scrape the bowl.
- Measuring cups and spoons, used to measure dry and liquid ingredients accurately.
- Zester, used to zest lemons finely for strong lemon flavor.
- Citrus juicer, used to extract fresh lemon juice efficiently.
- Wire cooling rack, used to cool the loaf evenly after baking.
Other Recipes to Try
-
Lemon Bars – When you want a punchy lemon dessert with a buttery base, these bars are the first thing we think of.
-
Peanut Butter Chocolate Chip Banana Bread – This one is great when you have ripe bananas and want a richer, more snacky loaf with plenty of chocolate.
-
Blueberry Muffins with Lemon Glaze – If you love lemon with fruit, these muffins give juicy blueberries and bright citrus in a grab and go form.
-
Spinach and Green Onion Salad – When you need something fresh on the side, this simple salad is a quick way to add greens to the table.
If you are craving something bright and easy, lemon poppy seed bread is such a satisfying bake to have in your back pocket. It comes together without much fuss, the lemon flavor feels real, and the slices hold up beautifully for a few days. If you give it a try, you should let it cool fully, slice it up, and enjoy!
When you make it, we would love to hear how it turned out for you. Did you keep it plain, sprinkle the top, or add a little drizzle after the fact? Share your results and any small tweaks that made it your own.
Lemon Poppy Seed Bread
Notes
- If you only have sour cream, you can swap it for the Greek yogurt in the same amount for a slightly richer crumb.
- For stronger lemon flavor, you can rub the lemon zest into the sugar with our fingertips before mixing the dry ingredients.
- You want to stop mixing as soon as the flour disappears to keep the loaf tender.
- If the top is browning too quickly, you can loosely tent the loaf with foil during the last 10 to 15 minutes of baking.
Store tightly covered at room temperature for up to 3 days, or refrigerate for up to 5 days for a firmer slice. - Freeze slices wrapped well for up to 2 months, then thaw at room temperature.
- Optional lemon glaze: whisk 1 cup powdered sugar (120 g) with 2 to 3 tablespoons fresh lemon juice (30 to 45 g) until thick but pourable, then spoon over the fully cooled loaf.